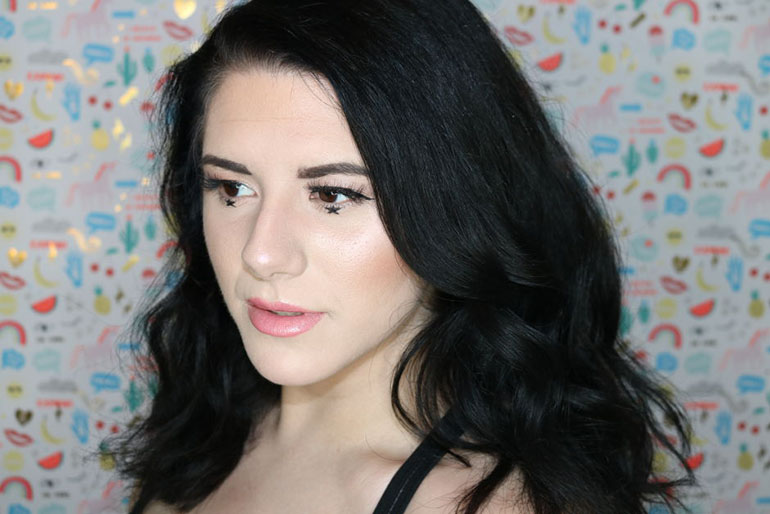
As the self-proclaimed Cotton Candy Glitter Princess of New York City, a city that pulses on public transportation, I’ve attracted much attention on the subway. Reactions range from quick, shy glances to full-on staring contests. Many people see NYC as the city of freedom — a place of Naked Cowboys, street performers, and club kids — but really, it’s a place with a bunch of people in varying shades of gray that like to stare at anything shiny or colorful.
And who can blame them? I’d probably stare at me., too.
Instead of plugging my earphones into my ears and closing my eyes, I’ve learned to accept it and to really not give an eff. If someone gets “enjoyment” out of my rainbow freckles and black lips, good for them. Let them stare. Because attention never bothered me anyway.
So here are five simple ways to break the makeup ennui, get a little crazy, and scream IDGAF.
Black Glittery Lips
I begin by lining my lips with Urban Decay 24/7 Waterline Pencil in Legend. To line my lips, I start by defining my cupid’s bow, the center of my bottom lip, and the corners of my mouth. I then basically play connect the dots, starting at the outer corner working toward the center. The liner allows me to have a bit more precision, especially since there is such high contrast between my lips and my skin.

I then used my a lip brush to fill my lips with black liquid lipstick. I start by applying the color to the center or my lips first, working it out toward my already-defined edges. I recommend using Jeffree Star’s Weirdo for this step.

To create the glittery paste for my lips, I used my lip brush to mix together a pea-size amount of Obsessive Compulsive Cosmetics Primer with a black glitter from… well, from a brand I no longer support. (In light of some of the comments on a few articles about brand honesty and authenticity, I’ve decided to omit the brand’s name.) To achieve this same result, I recommend using Violet Voss’s Wendy Glitter, which creates a similar opalescent effect. I, again, start at the center of my lips and work the product toward my outer corners.

The result is a heavy metal unicorn look only Lady Gaga (and myself… and maybe you) could love.

Copper Metallic Liner
This look was basically a science experiment. I started by tapping a pinch of Mehron Metallic Copper Powder onto a mixing surface (like this mixing plate by Pree Cosmetics).

I dipped my angled liner brush into my Mehron Mixing Liquid and then mixed it into the pinch of copper powder. Once the powder and the liquid formed a paste, I began to draw my cat-eye shape.
I angled the point of my brush toward the outer corner of my eye. To choose the proper angle for my eye shape, I imagine my bottom lash line continues up and up and up, past the outer corner of my eye. That’s how I determine the first stroke of my winged liner shape. I then connect that wing toward the center of my eye.

I continue the line all the way toward the inner corner of my eye, allowing it to get smaller and smaller as the line approaches my inner corner. I fill in any additional gaps, and I’m left with a flash of copper.

It’s like jewelry for my eyelids.

Blue Brows
Colorful brows just make me feel extra-cool. I used Chaos and Gonzo from the Urban Decay Electric Palette to create this look. Using my Morphe B74 angled liner brush, I used Chaos, the darker color, to give definition to the ends of my brows. Whenever I fill in brows, neon or otherwise, I always use two powders, starting with the darker at the outer corner of the brow where we generally grow less hair.

I fill in my brows using small strokes, following the direction of my natural hair growth, leaving the innermost parts of my brows blank.

I switch to my lighter color, Gonzo, to fill in the innermost part of my brow, still using little strokes following the natural direction of hair growth.

The result was some true mermaid realness.

Rainbow Freckles
Freckles are my go-to for jazzing up any boring look. For this look, I encourage you to use as many varying colors as you want.
For my freckles, I use a mix of liquid liners and liquid lipsticks. I started by using NYX White Liquid Liner to dot onto my cheeks and bridge of my nose, where the sun would naturally kiss the skin and cause freckles to be a bit more visible (I know our goal isn’t exactly natural here, but still.) Less is more because there are still plenty of layers to come.

The best liners for this step are those with a paintbrush applicator. Felt tips make it harder to place the product onto the skin. To create variety in my freckle sizes, I press a bit harder for bigger freckles and use minimal pressure for smaller freckles. I repeat this step with Sephora Colorful Waterproof Eyeliner in blue and Kat Von D Ink Liner in Nietzsche. I used a pointed concealer brush and Kat von D’s Everlasting Liquid Lipstick in Berlin to add some additional pink freckles.

I feel like a sprinkle-splattered sundae!

Starry Eyes
This look is definitely the most challenging. It takes a bit more patience, but the impact it makes is certainly worth it.
The most important tip to execute these looks: have confidence. Be proud in your style and just DGAF!
Do you feel like you might rock any of these looks in the near future? What is your favorite way to say “IDGAF”?
source: xovain.com


